MCC Creation and Connection
Step 1. Pre-configuration in Google Cloud Console
The goal of this stage is to generate unique application authorization keys (Client ID and Client Secret) inside the Google Cloud service to establish a secure data bridge.
-
Navigate to the Google developer console via the direct link: https://console.cloud.google.com/.
-
Open the platform's main navigation menu and go to the specialized Clients section.
-
In the top working panel, click the
+ Create Clientbutton.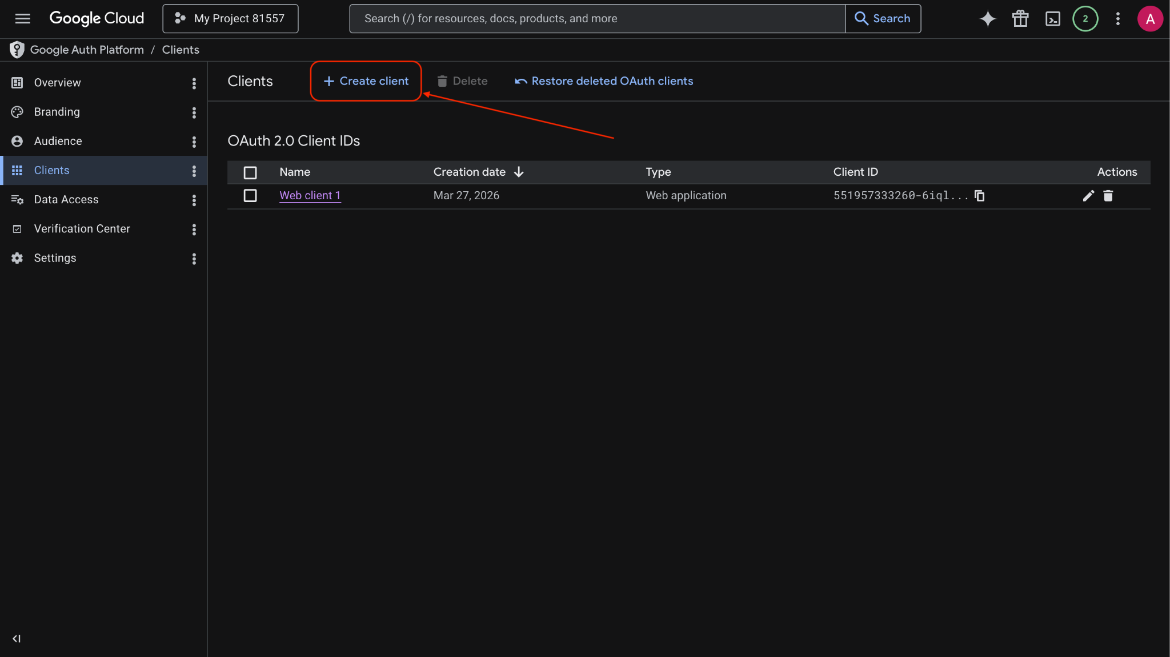
-
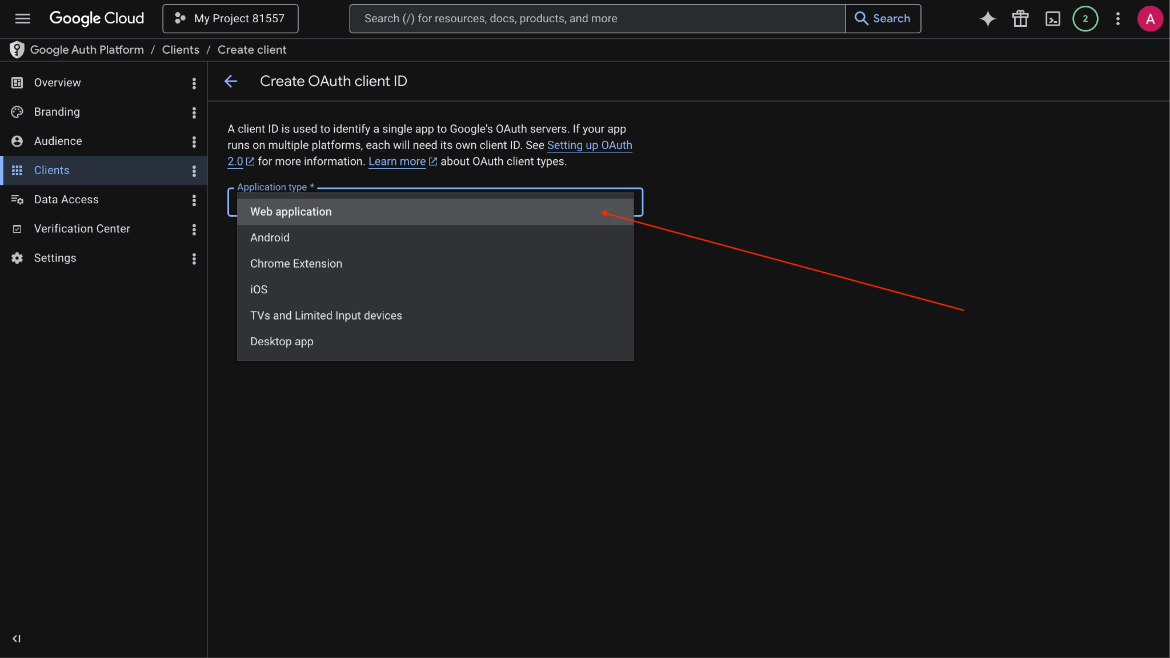
In the opened identifier creation form, strictly select Web application from the Application Type dropdown list.
-
Scroll down to the Authorized redirect URIs configuration block. Click the + Add URI button and make sure to add the following exact platform callback endpoint address:
https://api.liquidityhub.finance/admin/google_integration/googlecredential/oauth-callback/ -
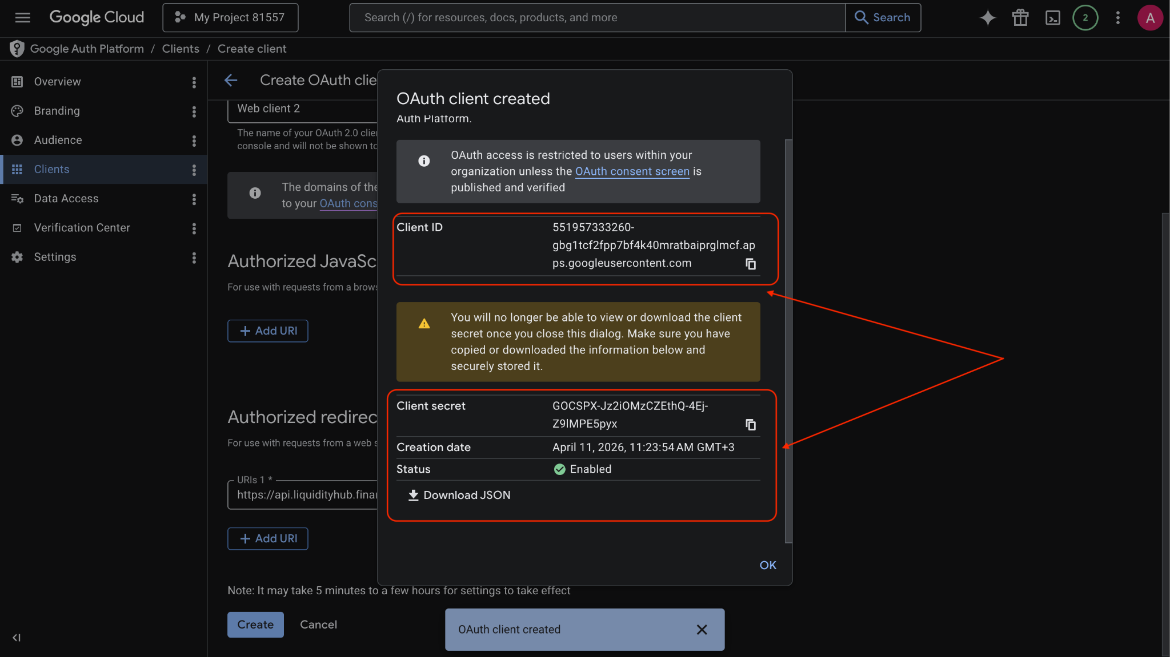
Once created, copy the OAuth Client ID and OAuth Client Secret.
Step 2. Creating the Root MCC on the Platform
The goal of this stage is to register and create a new digital object (MCC entity) inside our proprietary platform, capturing its technical identification parameters.
- Navigate to the API Management page.
- Click the Add MCC button.
- Populate the following required fields:
- Name — the reference name of the MCC within the platform dashboard.
- Account ID — Google Customer ID (the 10-digit account number). Where to find?
- OAuth Client ID — the OAuth client identifier. Where to find?
- OAuth Client Secret — the OAuth client secret string. Where to find?
- Developer Token — the Google Ads developer token. Where to find?
Step 3. Managing API Access
The goal of this stage is to authorize the created asset configuration within the Google ecosystem. We create an official API access line and establish a direct secure link between our platform and the live MCC account inside Google Ads.
- Navigate to the API Credentials section.
- Click the Create button.
- Populate the following required fields:
- Root MCC — the previously registered root MCC entity.
- Email — the designated contact operational email address.
- Administrator (optional) — the internal platform administrator responsible for overseeing this MCC.
Video example with creation flow (Google OAuth)
Video example with creation flow (Refresh-token)
Step 4. Validating Data Synchronization Routine
The goal of this stage is to monitor and verify the automated data import process initiated by the previous two configuration steps, ensuring that the account tree populates correctly on the platform.
- Once the above setup steps are processed, a system operational task to synchronize the account tree structure and all its interconnected objects triggers automatically.
- The execution status of the operation can be monitored in real time on the Operations page.
- Upon a successful processing cycle, the complete inherited data scheme will be displayed within the Actual Structure page, revealing the newly linked MCC along with all its nested child objects.